Bibliography


-
Anonymous.
Atlas of tidal currents, Bay of Fundy & Gulf of Maine.
Technical report, Canadian Hydrographic Service, Fisheries and Oceans, Ottawa, 1981.
-
Anonymous.
Canadian tide and current tables, volume 1, Atlantic Coast and Bay of Fundy.
Technical report, Canadian Hydrographic Service, Fisheries and Oceans Canada, 1999.
-
David A. Greenberg, T. S. Murty, and Alan Ruffman.
A Numerical Model for the Tsunami in Halifax Harbour due to the Explosion in December 1917.
Marine Geodesy, 16:153-167, 1993.
-
David A. Greenberg, T.S. Murty, and Alan Ruffman.
Modelling the tsunami from the 1917 Halifax Harbour explosion.
Tsunami Hazzards, 11(2):67-80, 1993.
-
D. McGonigal, R. Loucks, and D. Ingraham.
Halifax Narrows: sample current meter data 1970-71.
Data Report BI-D-74-5, Bedford Institute of Oceanography, Dartmouth, N.S., 1974.
-
Brian Petrie and Philip Yeats.
Simple models of the circulation, disolved metals, suspended solids and nutrients in Halifax Harbour.
Water Poll. Res. J. Canada, 25(3):325-349, 1990.
-
Alan Ruffman, David A. Greenberg, and T. S. Murty.
The Tsunami from the 1917 explosion in Halifax Harbour.
In Alan Ruffman and Colin Howell, editors, Ground Zero - A reassessment of the 1917 Explosion in Halifax Harbour, page 327. Nimbus Publishing and Gorsebrook Research Institute for Atlantic Canada Studies, Halifax, Nova Scotia, 1994.
Figure 1: Full Harbour, High Tide
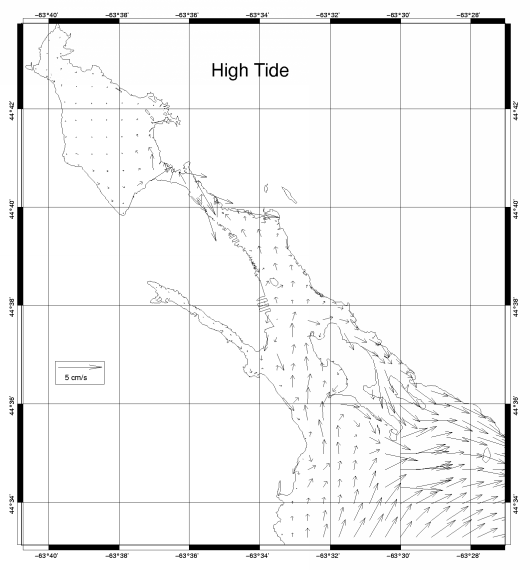
Figure 2: Full Harbour, One Hour After High Tide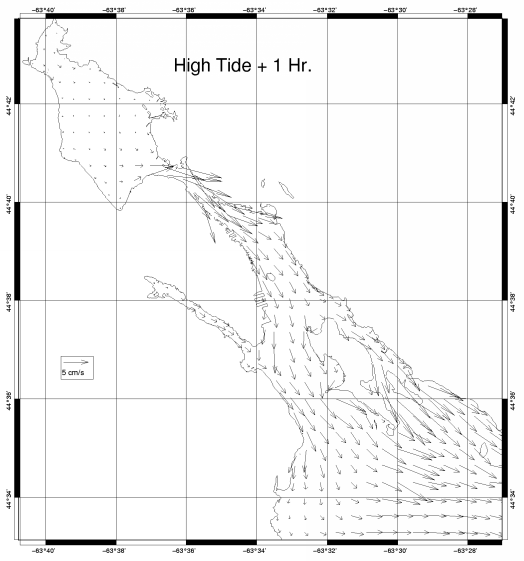
Figure 3: Full Harbour, Two Hours After High Tide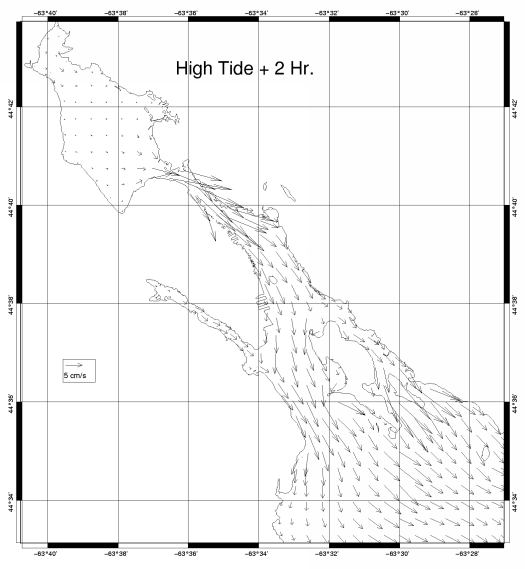
Figure 4: Full Harbour, Three Hours After High Tide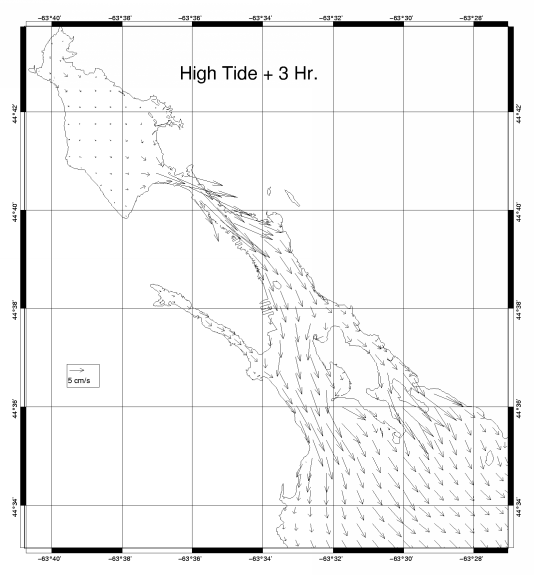
Figure 5: Full Harbour, Two Hours Before Low Tide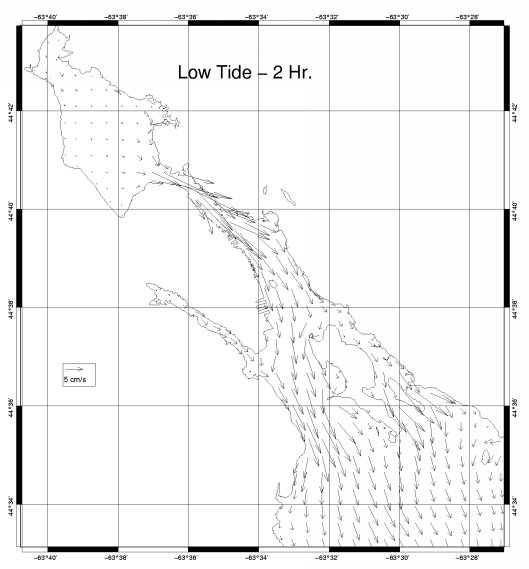
Figure 6: Full Harbour, One Hour Before Low Tide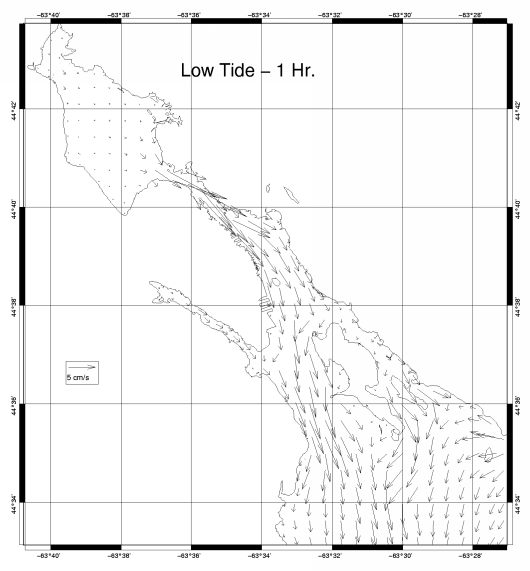
Figure 7: Full Harbour, Low Tide
Figure 8: Full Harbour, One Hour After Low Tide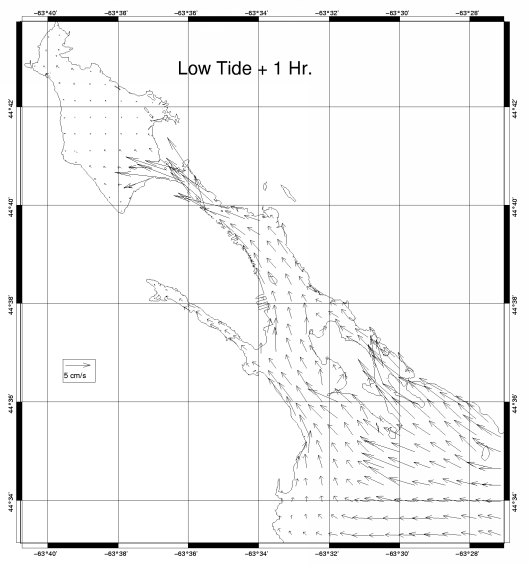
Figure 9: Full Harbour, Two Hours After Low Tide
Figure 10: Full Harbour, Three Hours After Low Tide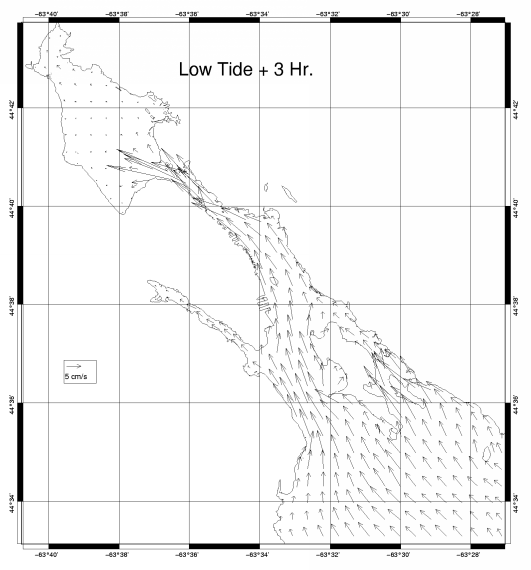
Figure 11: Full Harbour, Two Hours Before High Tide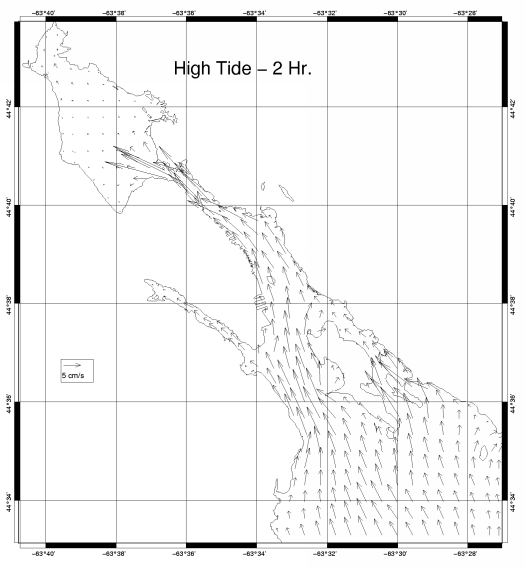
Figure 12: Full Harbour, One Hour Before High Tide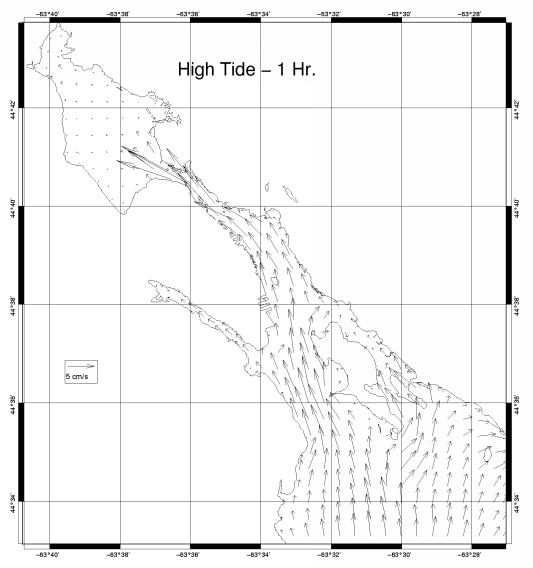
Figure 13: Inner Harbour, High Tide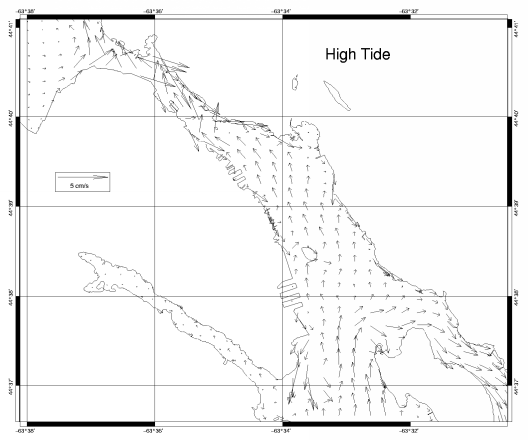
Figure 14: Inner Harbour, One Hour After High Tide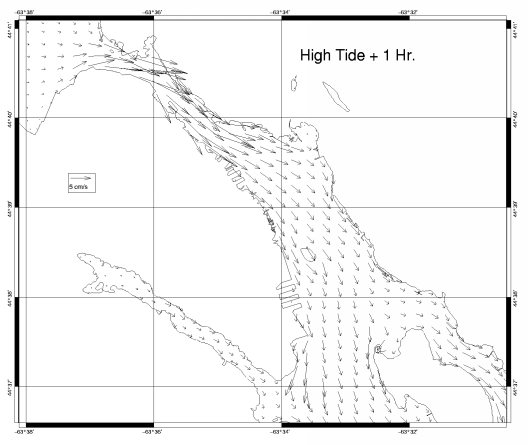
Figure 15: Inner Harbour, Two Hours After High Tide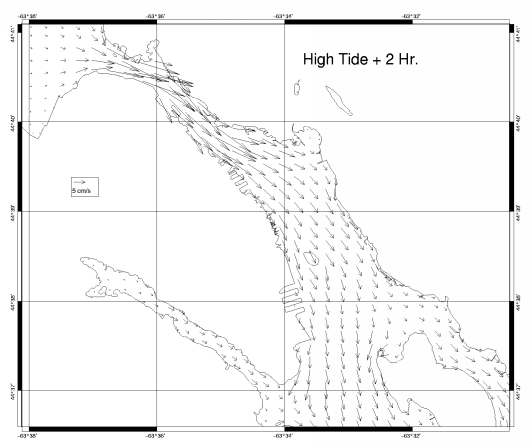
Figure 16: Inner Harbour, Three Hours After High Tide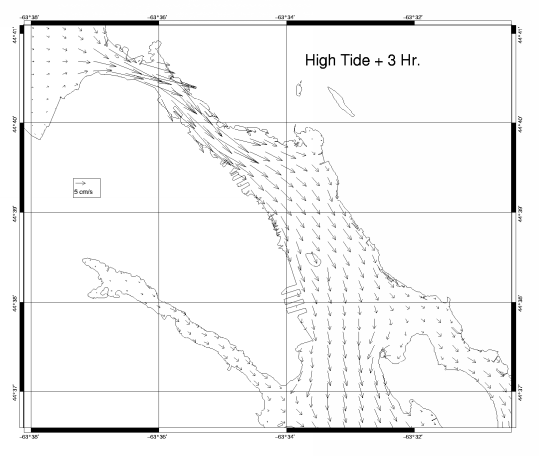
Figure 17: Inner Harbour, Two Hours Before Low Tide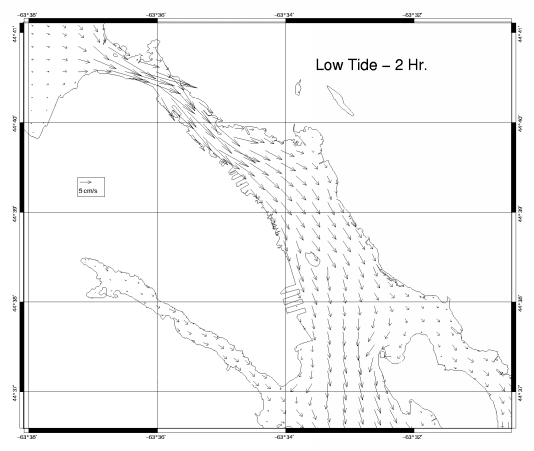
Figure 18: Inner Harbour, One Hour Before Low Tide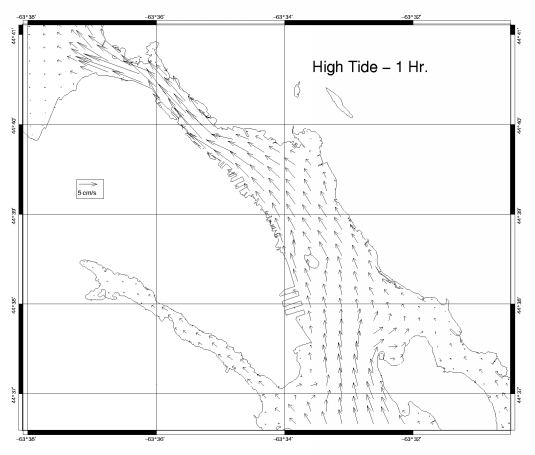
Figure 19: Inner Harbour, Low Tide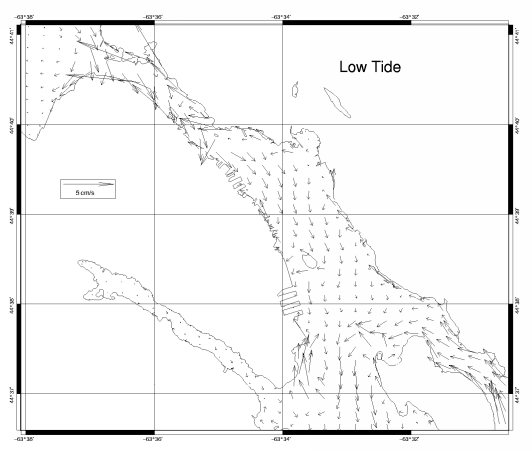
Figure 20: Inner Harbour, One Hour After Low Tide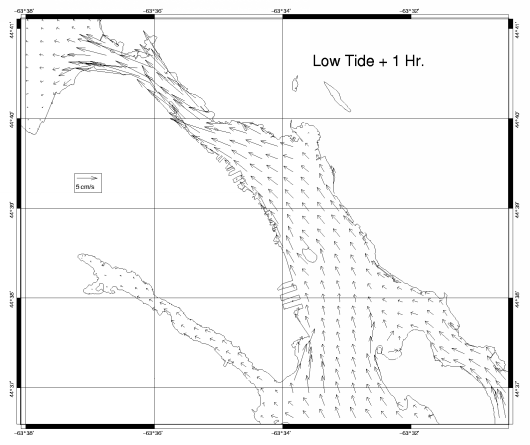
Figure 21: Inner Harbour, Two Hours After Low Tide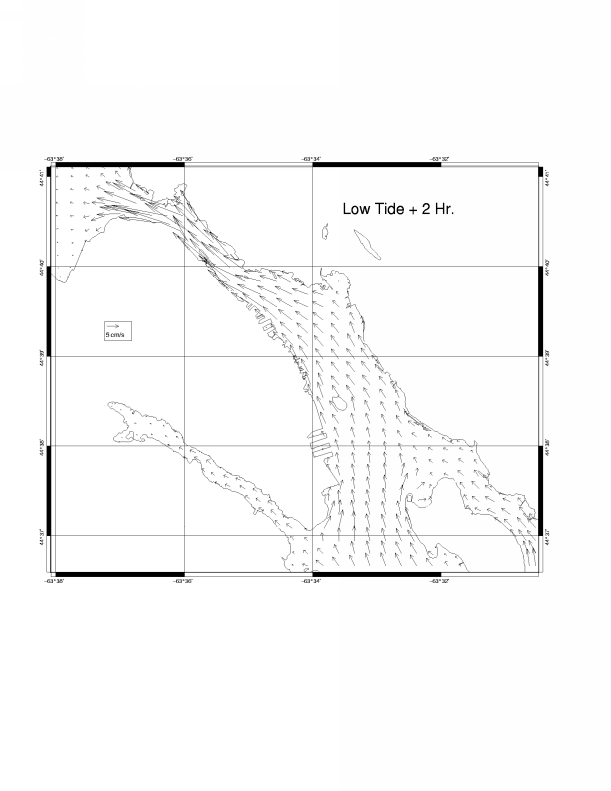
Figure 22: Inner Harbour, Three Hours After Low Tide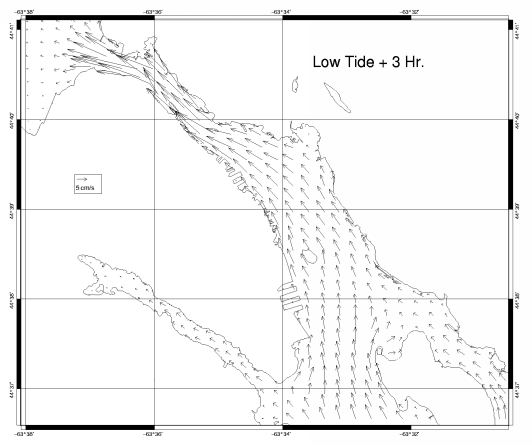
Figure 23: Inner Harbour, Two Hours Before High Tide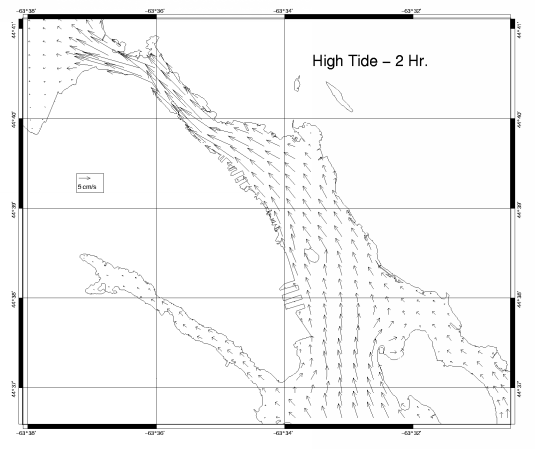
Figure 24: Inner Harbour, Two Hours Before High Tide
- Date modified: